BACK PROJECTION - OUR WORKFLOW & SETUP

Back Projection is the recommended technology we prefer to use for Virtual Vehicle Production
(our in-depth video breakdown as to why will be released shortly, stay tuned!)
LED Volumes are fantastic for many other purposes however, and if you would prefer to use LEDs, just let us know!
(If you are interested in our LED work please click the link below):
- HOW WE DO IT -

Step 1: The Driving Plates
We can shoot bespoke Driving Plates for your project, using one of our specialised tracking vehicles, and process and pre-grade the plates before bringing to set.
Alternatively, we have an extensive library of hundreds of clips, all shot on ARRI Alexa cameras, which we would be happy to license out for use by your film, contact us with your requirements and we can inform you if we have clips in our library that match your needs.
We can also assist in the procurement of vintage plates, before processing and appropriately modifying them, or accept footage given to us directly by your production - though in that case it is best for us to have a conversation in advance, to ensure the footage given to us will fit the needs of the production and be appropriate for the quality of work that we aim to deliver.
Step 2: On Set
Our workflow is flexible and modular, convenience is a large component, so we will bring our set-up to you. We will come to the studio you are shooting in, so no need for a company move.
Ahead of filming, we require a full rigging day to give us time to rig, test and calibrate our equipment. We will require access to the studio & power for our equipment, but apart from that are self sufficent, our technicians will take care of everything.
Step 3: Shooting in Studio
On the day of shooting changing background footage is quick and easy for us - requiring only minor changes in our imaging output program. Physically moving screens, cars, and lights takes much longer, though we have compressed our setup so as to allow a smaller minimum number of lights and limit the time inbetween set-ups.
The devil is in the details - that is why we combine the back projection image together with separate projections designed to appear in reflective surfaces (eg. windscreen) and our innovative reactive lighting system - synchronised with the background image, aimed at completely immersing the scene into reality. The level of control and realism this gives us is all intended to give you the best visuals and flexibility.
On the day we run the projection via our onset playback system, which allows for image reposition, cutting, and grading to match camera - meaning we can immediately make any change you may need on the fly, to either the visuals or the footage, in order to stay flexible and adjust to produce the best visuals possible.


Step 4: Post-Production
There isn’t any - all done! No need to worry about the green screen, VFX, everything is already in the can.
- PREVIOUS WORK-
See how all of the components come together in the finished result.
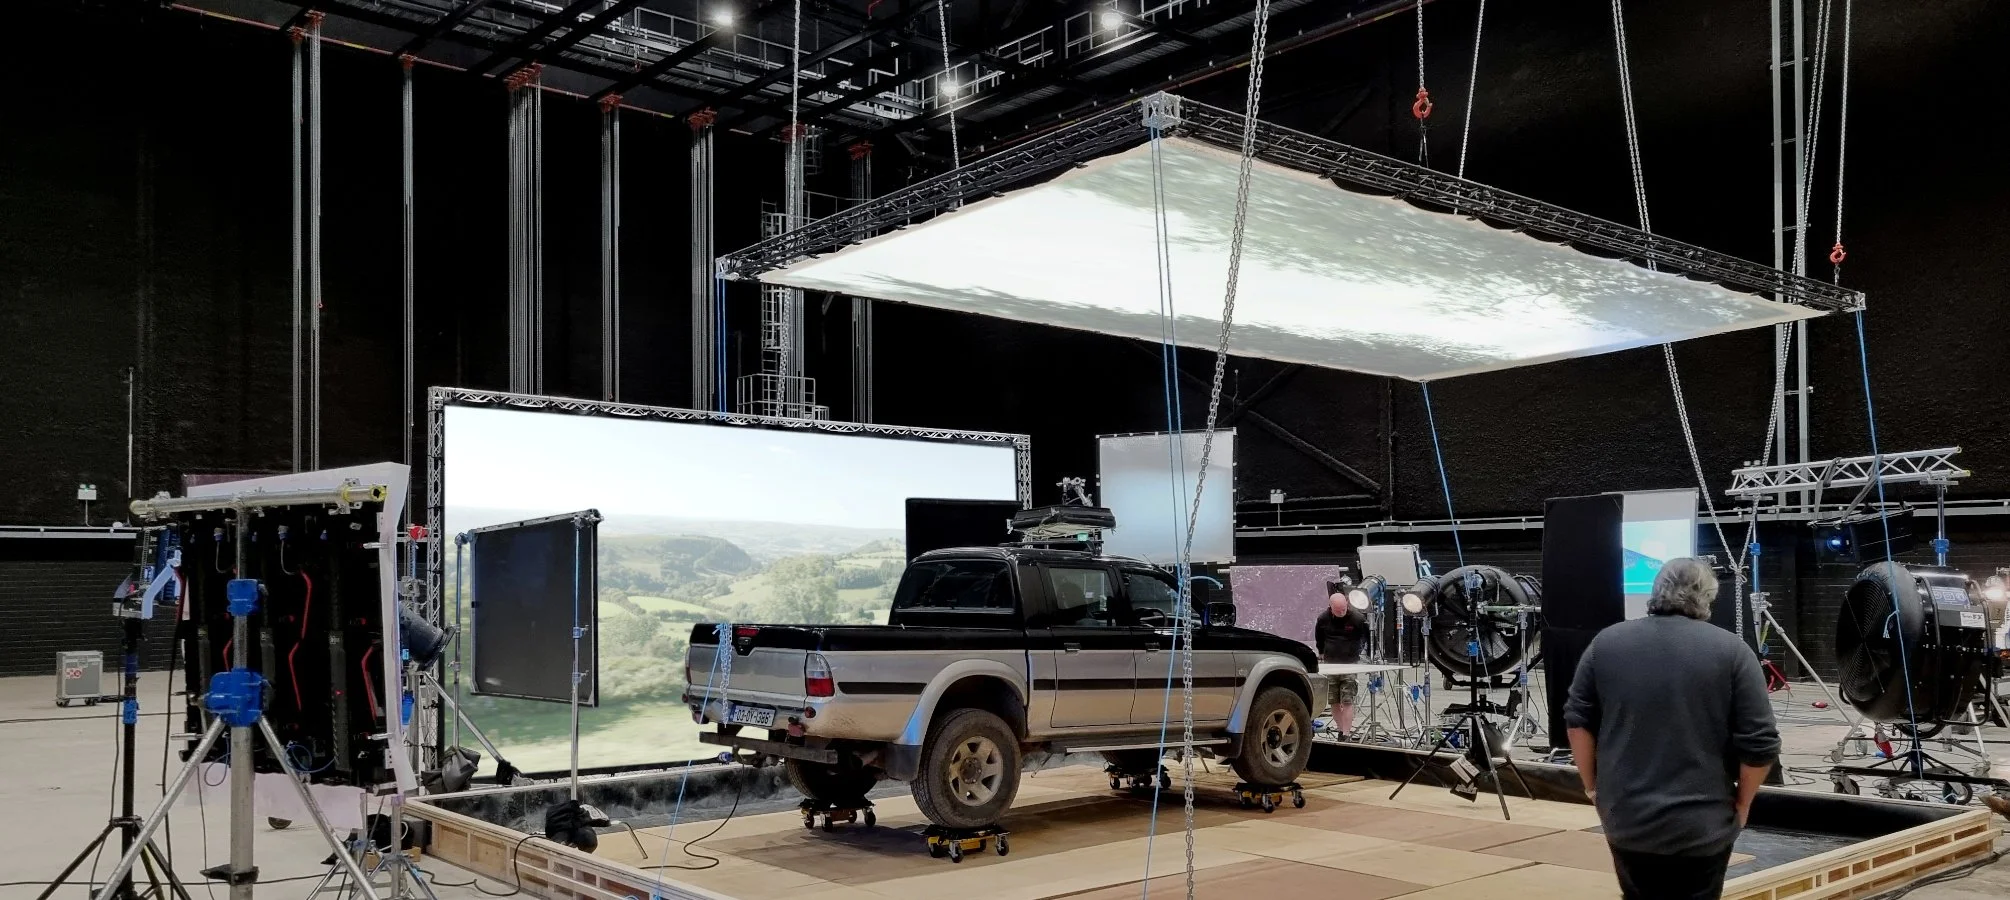
- OUR SETUP : CARS -
Standard Layout
In order to create the most realistic image possible we employ several key pieces of equipment for Back Projection:
Main Background Screen (this is the screen that will be most visible in the shot, directly opposite the camera)
Reflection Screen (goes above the car, is used for reflecting the sky / trees / street lamps / etc in the windshield)
Active lighting (we use our Lighting projectors & Lighting LEDs as the key & fill lights in the scene, synchronized to the background), this provides a good foundation of stylized lighting for the DOP to build on with additional lights, if need be.

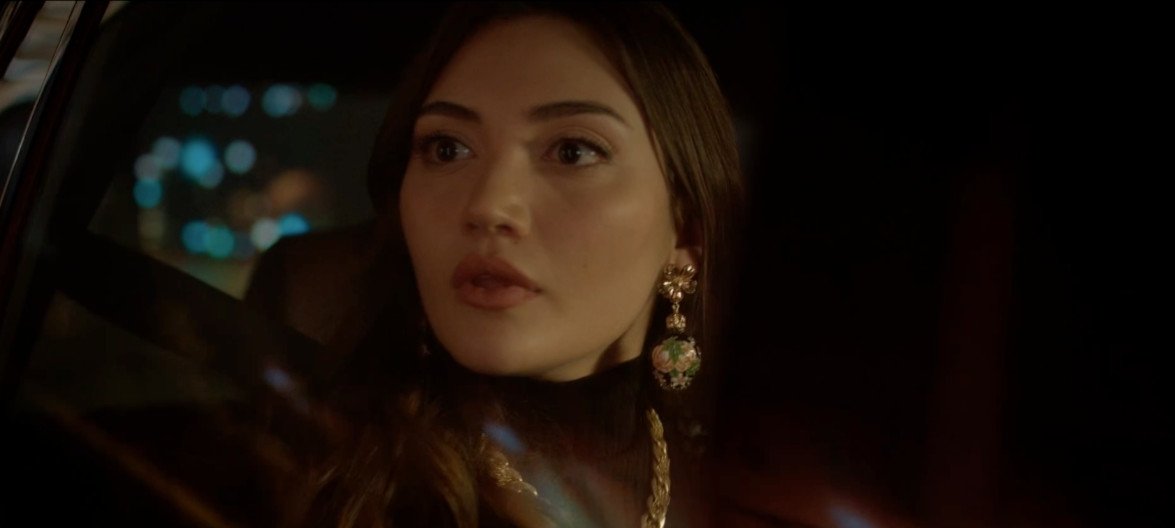
Cam A

Source: Spectre (2015)

When it comes time to shoot profile shots the best workflow is to rotate the car (and move the lighting to match this move), keeping the main screen and overhead screens static. The overhead screen is angled to a more vertical angle and used for reflections in the car’s side window.

Optional Extras
The setup is very flexible - allowing the addition of many optional extras, and various configurations, such as:
Front view screen (so actors can view the road POV and react appropriately - eg. for stunt sequences / curvy roads)
Side Screen (for when shooting simulateneously with multiple cameras that are at drastically different angles)
Additional Lighting (the condenced setup we have is designed for optimal speed vs efficiency, however for certain shots / situations more Active Lighting may required) (eg. for big vehicles such as a bus)


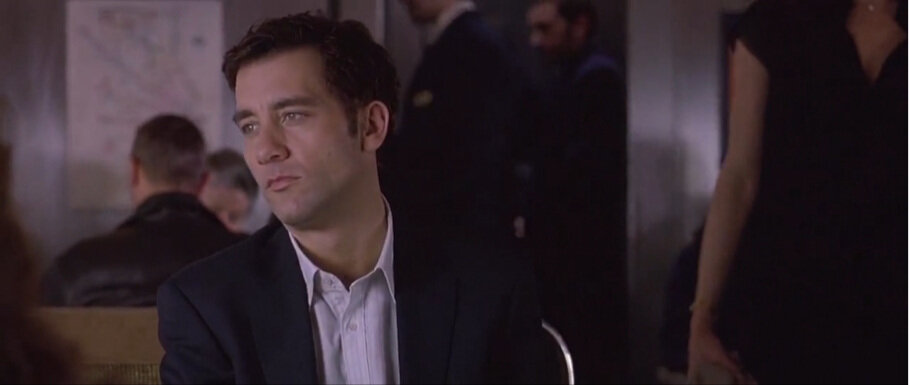
Cam A

Cam B

Source: Good Omens (Season 1)
Note:
The company / crew supplying & responsible for the picture car should also provide Car Wheel Skates, in order to allow easy movement / rotation / adjustment of the car when in position. This will aid the filming process greatly, and help speed up shooting on the day.
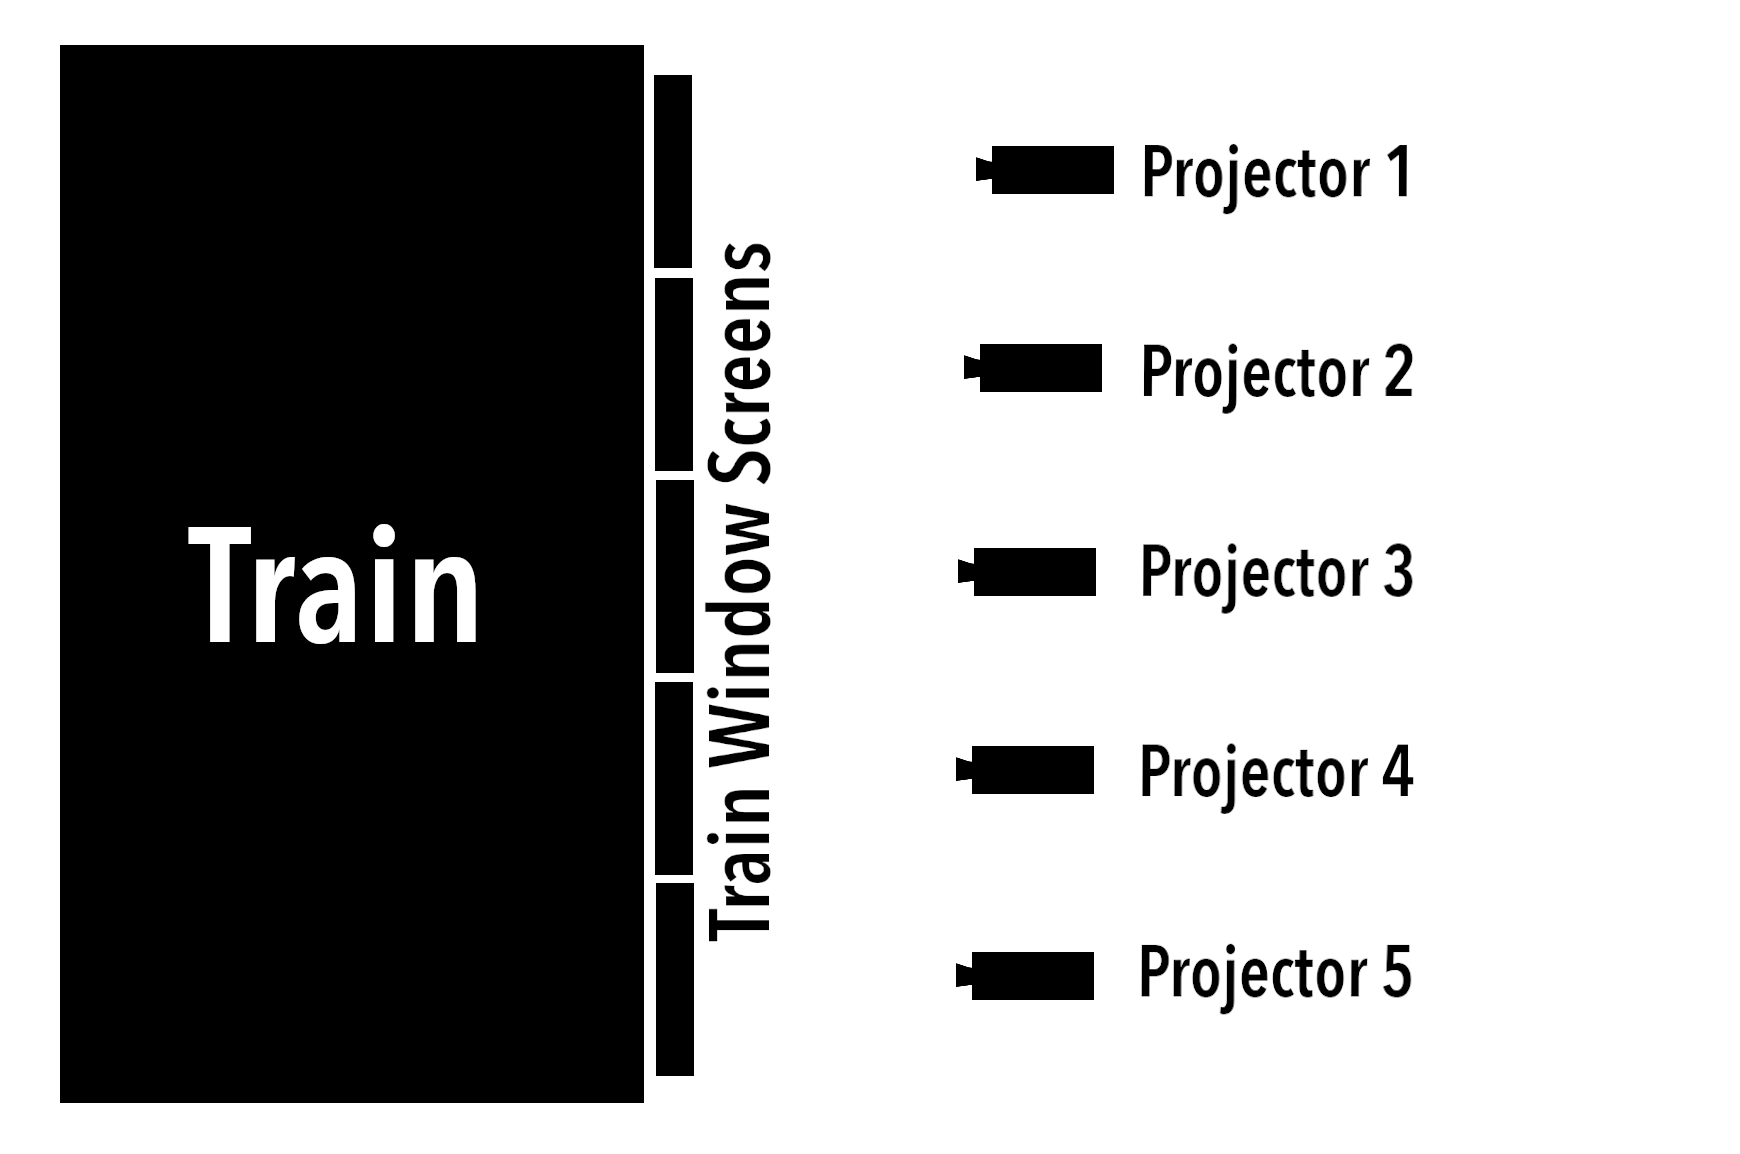
- OUR SETUP : TRAINS / BUSES -
Visible background
Modern trains / buses with an open-plan layout require several screens and projectors to effectively cover all of the windows of the carriage (precise number depending on exact composition of shot).
The projectors are then elevated to match the height of the train carriage film set, and rotated to match the angle of the camera, in order to remain perpendicular to the camera.
Our Back Projection setup then allows additional lighting to be inserted in the gaps to provide dedicated lighting channels for the scene.

Cam A

Source: Derailed (2003)
Lighting only
For use when the windows are not visible in shot, but reactive lighting is needed to bring life to the scene. Projectors can light the scene straight through the windows, though it is advisable to insert some kind of diffusion material between the projector and final subject.

Let us know if you have any more questions.
Trusted by our valuable clients: